In this article, you will learn how to create an interactive terminal-based portfolio and résumé in JavaScript. We'll use the jQuery Terminal library (and a few other tools) to create a website that looks like a real terminal.
This article will show more advanced usage of the jQuery Terminal library. If you want something more basic, you can check this article: How to create interactive terminal like website with JavaScript that is written for more entry level programmers. You can also read it first before you begin reading this one.
Table of Contents
- Table of Contents
- What is the Terminal?
- What is jQuery Terminal?
- Base html file
- How to Initialize the Terminal
- Greetings
- How to Make Your First Command
- Default commands
- How to Make Help Commands Executable
- Syntax highlighting
- Tab Completion
- How to Add Shell Commands
- How to Improve Completion
- Typing Animation Command
- Credits Command
- Prefilled Commands
- What Next?
What is the Terminal?
Terminals have a long history. It started as an upgrade from punch cards. The computers back in the day were using teletypes, it was just a keyboard and a printer. You'd type on the keyboard, and the keystrokes would be sent to the computer (usually mainframe) and the output printed on a printer.
Later on, the teletypes were replaced with terminals. A terminal was like the dump computer we see today. It was a CRT Monitor with a keyboard. So instead of getting the output on the printer, it would be displayed on the monitor.
Today we still use this type of interface (Command Line) to talk with computers.
Those are terminal emulators and are a big part of Unix systems, like GNU/Linux or MacOS. On Windows, you have PowerShell or cmd.exe file that allows you to type commands and get responses in the form of text. You can also install GNU/Linux system on Windows in the form of WSL. CLI interfaces are used mostly by power users, developers, and system administrators.
If you're new to command line you can read this article: Command Line for Beginners – How to Use the Terminal Like a Pro [Full Handbook].
What is jQuery Terminal?
jQuery Terminal is a JavaScript library. It's a plugin for the jQuery library. jQuery Terminal is more like a framework that has jQuery as its dependency. We'll mostly use JavaScript and very little jQuery in this article.
Let's create our terminal based portfolio using jQuery Terminal.
Base html file
The first thing you need to do is to include jQuery and jQuery Terminal library.
This is a basic HTML file:
<!DOCTYPE html>
<html>
<head>
<link rel="stylesheet" href="https://cdn.jsdelivr.net/npm/jquery.terminal/css/jquery.terminal.min.css"/>
</head>
<body>
<script src="https://cdn.jsdelivr.net/npm/jquery"></script>
<script src="https://cdn.jsdelivr.net/npm/jquery.terminal/js/jquery.terminal.min.js"></script>
<script src="my-terminal.js"></script>
</body>
</html>
Then inside the my-terminal.js file, we will write our code in JavaScript.
How to Initialize the Terminal
To create a basic terminal you need to put in this code:
const commands = {};

const term = $('body').terminal(commands);
The first argument to the terminal method is called an interpreter. It's a way to add your commands. An object is the simplest way to create them. See creating the interpreter to learn more.
If the terminal font is too small you can make it a little bit bigger with CSS custom properties (also known as CSS variables):
:root {
    --size: 1.2;
}
Greetings
The first thing we need to do is to get rid of the default greetings message and replace it with nice-looking custom ASCII Art. We will use Filget library written in JavaScript.
There are few figlet libraries on npm. We will use a package named figlet.
First thing you can do is to pick the right font. Go to figlet playground and write the text you want for your greeting. We will use "Terminal Portfolio" and click "Test All". It should display your text with all the fonts. Scroll through the list and pick the font you like.
We picked a font "slant" that looks like this:

You can copy this text and put into a string, but you will have issues like backslash
needed to be escaped the quote characters.
const greetings = `  ______                    _             __   ____             __  ____      ___
 /_  __/__  _________ ___  (_)___  ____ _/ /  / __ \\____  _____/ /_/ __/___  / (_)___
  / / / _ \\/ ___/ __ \`__ \\/ / __ \\/ __ \`/ /  / /_/ / __ \\/ ___/ __/ /_/ __ \\/ / / __ \\
 / / /  __/ /  / / / / / / / / / / /_/ / /  / ____/ /_/ / /  / /_/ __/ /_/ / / / /_/ /
/_/  \\___/_/  /_/ /_/ /_/_/_/ /_/\\__,_/_/  /_/    \\____/_/   \\__/_/  \\____/_/_/\\____/`

const term = $('body').terminal(commands, {
    greetings
});
NOTE: The second argument to the jQuery Terminal is an object with options – we used a single option greetings.
This doesn't look good and it's hard to modify. Also, if you create the greeting by hardcoding a string, it may get distorted on smaller screens. That's why we will use the figlet library in JavaScript.
First, we need to include the figlet library in HTML:
<script src="https://cdn.jsdelivr.net/npm/figlet/lib/figlet.js"></script>
To initialize the library in JavaScript, we need to load the fonts:
const font = 'Slant';

figlet.defaults({ fontPath: 'https://unpkg.com/figlet/fonts/' });
figlet.preloadFonts([font], ready);
This code will load the 'Slant' font and call the function ready when the font is loaded.
So we need to write this function:
function ready() {

}
Now we can do two things, we can put the initialization of jQuery Terminal inside that function:
let term;

function ready() {
   term =  $('body').terminal(commands, {
      greetings
   });
}
With this, we can use the greeting option, but we can also use the echo method to render the greeting, and when initializing the terminal we will put null or false as a greetings to disable the default one:
const term = $('body').terminal(commands, {
    greetings: false
});

function ready() {
   term.echo(greetings);
}
This will work better because the library will initialize the terminal immediately and will not need to wait for loading the fonts.
Note that we still need to define the greetings using figlet. To do this we can write this function:
function render(text) {
    const cols = term.cols();
    return figlet.textSync(text, {
        font: font,
        width: cols,
        whitespaceBreak: true
    });
}
This function uses the figlet::textSync() method to return string and use terminal::cols(), to get the number of characters per line. With this, we can make our text responsive.
This function can be used inside ready.
function ready() {
   term.echo(render('Terminal Portfolio'));
}
This will create a string and pass it to the echo method. But this will be the same as with:
term.echo(greeting);
And our hard-coded greetings. So if you resize the terminal, the greetings still can get distorted. To make the text responsive you need to echo a function. This function will be called on each re-render of the terminal, which will happen when you resize the page.
We can use the arrow function for this:
function ready() {
   term.echo(() => render('Terminal Portfolio'));
}
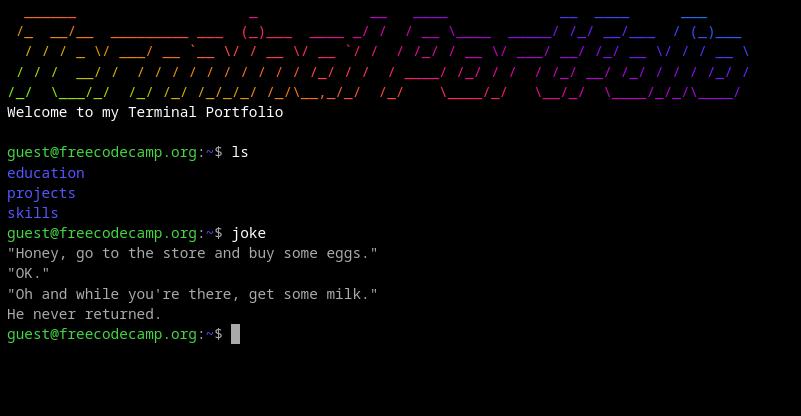
If you want to add some text below the ASCII art, you can do this by concatenating the string after render:
function ready() {
   term.echo(() => {
     const ascii = render('Terminal Portfolio');
     return `${ascii}\nWelcome to my Terminal Portfolio\n`;
   });
}
NOTE: If you run this code you will notice that there is an empty line after the ASCII art. This is because the figlet library adds some spaces after the text. To get rid of it you can use string::replace with a regular expression that will remove all spaces and newlines from the end.
We can't use string::trim(), because we don't want to remove the leading lines:
function render(text) {
    const cols = term.cols();
    return trim(figlet.textSync(text, {
        font: font,
        width: cols,
        whitespaceBreak: true
    }));
}

function trim(str) {
    return str.replace(/[\n\s]+$/, '');
}
Additional things you can do is to pause the terminal when it loads the fonts:
const term = $('body').terminal(commands, {
    greetings: false
});

term.pause();

function ready() {
   term.echo(() => render('Terminal Portfolio')).resume();
}
The same as with jQuery, you can can chain terminal methods.
Line Gaps
If the font you pick creates gaps between the lines – like on this image with font ANSI Shadow:
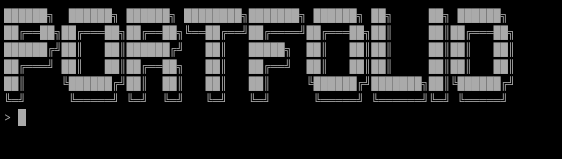
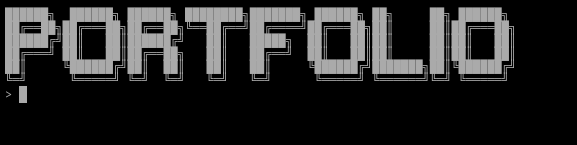
You can remove the gaps by adding the ansi option set to true. The option was added specifically to fix an issue with displaying ANSI Art.
term.echo(() => render('Terminal Portfolio'), { ansi: true });The above ASCII Art will look like this:
const commands = {};

const term = $('body').terminal(commands);
The string 'body' indicates the CSS selector where Terminal should be created. Here we use 'body' so the terminal will be the only thing on the page. But it doesn't have to be full screen. You can create a website where terminal is only part of the page like in a window that looks like part of the Operating System.
How to Add Colors to ASCII Art
You can spice up a big ASCII art by using a library called lolcat. lolcat is a Linux command that can style text in the terminal with rainbow colors. And there is a library called isomorphic-lolcat, that you can use in JavaScript to make your ASCII art in rainbow colors.
Terminal Formatting
To use the lolcat library, you first need to know how to change the colors of the terminal.
You can do this using low-level formatting that looks like this:
[[b;red;]some text]
The whole text is wrapped in brackets and the formatting of the text is in additional brackets, where each argument is separated by a semicolon. To learn more about the syntax you can read the Wiki Article: Formatting and Syntax Highlighting.
Here, we'll only use a basic change of color. Instead of red, you can use CSS color names, hex color, or rgb().
How to Use the lolcat Library
To use the library, we first need to include it in HTML:
<script src="https://cdn.jsdelivr.net/npm/isomorphic-lolcat"></script>
To format the string with colors, we can use this function:
function rainbow(string) {
    return lolcat.rainbow(function(char, color) {
        char = $.terminal.escape_brackets(char);
        return `[[;${hex(color)};]${char}]`;
    }, string).join('\n');
}

function hex(color) {
    return '#' + [color.red, color.green, color.blue].map(n => {
        return n.toString(16).padStart(2, '0');
    }).join('');
}
The lolcat.rainbow will call a function in every character from the input string, and pass color as an object with RGB values and the character.
Rainbow ASCII Art greetings
To use this code, you need to wrap the call to render with rainbow:
function ready() {
   term.echo(() => {
     const ascii = rainbow(render('Terminal Portfolio'));
     return `${ascii}\nWelcome to my Terminal Portfolio\n`;
   }).resume();
}
You can also use two calls to echo, since only Figlet message needs to be executed inside the function:
function ready() {
   term.echo(() => rainbow(render('Terminal Portfolio')))
       .echo('Welcome to my Terminal Portfolio\n').resume();
}
You'll notice that when you resize the window, the rainbow changes randomly. This is the default behavior of lolcat. To change it, you need to set the random seed.
function rand(max) {
    return Math.floor(Math.random() * (max + 1));
}

function ready() {
   const seed = rand(256);
   term.echo(() => rainbow(render('Terminal Portfolio'), seed))
       .echo('Welcome to my Terminal Portfolio\n').resume();
}

function rainbow(string, seed) {
    return lolcat.rainbow(function(char, color) {
        char = $.terminal.escape_brackets(char);
        return `[[;${hex(color)};]${char}]`;
    }, string, seed).join('\n');
}
The rand function returns a pseudo-random number from 0 to max value. Here we created a random value from 0 to 256.
How to Make the Greeting Text White
As we showed previously, you can make the text white with terminal formatting.
You can use:
[[;white;]Welcome to my Terminal Portfolio][[;#fff;]Welcome to my Terminal Portfolio][[;rgb(255,255,255);]Welcome to my Terminal Portfolio]
Moreover, if you include additional file XML formatting, you can use XML-like syntax. That makes formatting much easier.
<script src="https://cdn.jsdelivr.net/npm/jquery.terminal/js/xml_formatting.js"></script>
After including the above file in HTML, you can use CSS named colors as XML tags:
<white>Welcome to my Terminal Portfolio</white>
The XML formatting supports more tags like links and images, see Extension XML Formatter, on a Wiki.
NOTE: XML formatter is a function added to $.terminal.defaults.formatters, which transforms the input XML-like text into terminal formatting. You can add the same to your own formatters.
How to Make Your First Command
After the greeting, we can write our first command. It will be helpful and will work with any commands we add later.
const commanns = {
    help() {

    }
};
This will be our help command where we'll add a list of commands available to our terminal portfolio. We will use Intl.ListFormat, which creates a list of elements with and before the last element.
const formatter = new Intl.ListFormat('en', {
  style: 'long',
  type: 'conjunction',
});
To create a list, we need to use formatter.format() and pass an array of commands.
To get that array we can use Object.keys():
const commands = {
    help() {
        term.echo(`List of available commands: ${help}`);
    }
};

const command_list = Object.keys(commands);
const help = formatter.format(command_list);
When you type help you should see:
List of available commands: help
You also need to add the echo command:
const commands = {
    help() {
        term.echo(`List of available commands: ${help}`);
    },
    echo(...args) {
        term.echo(args.join(' '));
    }
};
Now the help command works:
List of available commands: help and echo
But if you try to execute 'echo hello' you will get an error:
[Arity] Wrong number of arguments. The function 'echo' expects 0 got 1!
By default, jQuery Terminal checks the number of arguments and the number of parameters the function accepts. The problem is that the rest operator makes all arguments optional and the length function property is 0. To fix the issue we need to disable the arity check with an option:
const term = $('body').terminal(commands, {
    greetings: false,
    checkArity: false
});
Now the echo commands should work.
Default commands
By default, the jQuery Terminal have two default commands:
clear: this command clears everything on the terminal.exit: this command exits from nested interpreters.
You can disable them by passing the name to the option and setting it to false. Since we won't use nested interpreters, we can disable exit:
const term = $('body').terminal(commands, {
    greetings: false,
    checkArity: false,
    exit: false
});
But clear can be useful. So we can add it to the list of commands:
const command_list = ['clear'].concat(Object.keys(commands));
How to Make Help Commands Executable
We can make the UX better to allow clicking on the command and execute it just like when the user types it. We will need a few things. First, we need to add formatting to each command and add an HTML class attribute. We can also make the command white so it's more visible.
const command_list = Object.keys(commands);
const formatted_list = command_list.map(cmd => {
    return `<white class="command">${cmd}</white>`;
});
const help = formatter.format(formatted_list);
Next is to add affordance. To indicate that the user can click the command we need to change the cursor in CSS:
.command {
    cursor: pointer;
}
The last step is to execute the command when the user clicks the command. We need to add an event handler with jQuery (jQuery Terminal dependency) or we can use the native browser addEventListener. Here we use jQuery:
term.on('click', '.command', function() {
   const command = $(this).text();
   term.exec(command);
});
terminal::exec() is a way to execute a command programmatically, just like user would type it and press enter.
You can test it by typing help and clicking help again.
Clicking echo will print an empty line. We can fix it by checking if the array of arguments is not empty, before executing terminal::echo():
const commands = {
    echo(...args) {
        if (args.length > 0) {
            term.echo(args.join(' '));
        }
    }
};
Now clicking on echo will only show the executed command.
NOTE: If for any reason you don't want to show the prompt and the command that has been executed, you can silence the exec by passing true as the second argument.
term.exec('help', true);
Syntax highlighting
As we discussed earlier, we can use custom syntax highlighting of our shell by pushing a function into $.terminal.defaults.formatters.We can also use the $.terminal.new_formatter helper function.
Let's make our commands white as we type them. The formatter can be an array (of regex and replacement), or a function. We have a fixed number of commands and we only want to make those that are on the list white. We can do this by adding a regular expression:
const any_command_re = new RegExp(`^\s*(${command_list.join('|')})`);
This regular expression will check if, at the beginning of the string, there is an optional whitespace and one of the commands. Right now the regex will look like this: /^\s*(help|echo)/.
$.terminal.new_formatter([any_command_re, '<white>$1</white>']);
If you would like to make command arguments in different colors, you'll need a function, where you will to use String::replace.
const re = new RegExp(`^\s*(${command_list.join('|')}) (.*)`);

$.terminal.new_formatter(function(string) {
    return string.replace(re, function(_, command, args) {
        return `<white>${command}</white> <aqua>${args}</aqua>`;
    });
});
This is just an example of using String::replace. If you have just one replacement, you can use an array. This will be the same:
const re = new RegExp(`^\s*(${command_list.join('|')})(\s?.*)`);

$.terminal.new_formatter([re, function(_, command, args) {
    return `<white>${command}</white><aqua>${args}</aqua>`;
}]);NOTE: If you add class <white class="command"> to the formatter you will be able to click on the typed command to execute it again.
Tab Completion
Another feature we can add is to complete the command when you press the tab key. This is super easy – we only need to add completion option set to true:
const term = $('body').terminal(commands, {
    greetings: false,
    checkArity: false,
    exit: false,
    completion: true
});
Now when you type h and press the tab it will complete the command help for you.
How to Add Shell Commands
Now we can add the most important commands that allow us to navigate through the portfolio. We will implement directories as the main entry point so the user will need to type the ls command to see the list of things, cd into that directory, and ls again to see the contents.
const directories = {
education: [
'',
'<white>education</white>',
'* <a href="https://en.wikipedia.org/wiki/Kielce_University_of_Technology">Kielce University of Technology</a> <yellow>"Computer Science"</yellow> 2002-2007 / 2011-2014',
'* <a href="https://pl.wikipedia.org/wiki/Szko%C5%82a_policealna">Post-secondary</a> Electronic School <yellow>"Computer Systems"</yellow> 2000-2002',
'* Electronic <a href="https://en.wikipedia.org/wiki/Technikum_(Polish_education)">Technikum</a> with major <yellow>"RTV"</yellow> 1995-2000',
''
],
projects: [
'',
'<white>Open Source projects</white>',
[
['jQuery Terminal',
'https://terminal.jcubic.pl',
'library that adds terminal interface to websites'
],
['LIPS Scheme',
'https://lips.js.org',
'Scheme implementation in JavaScript'
],
['Sysend.js',
'https://jcu.bi/sysend',
'Communication between open tabs'
],
['Wayne',
'https://jcu.bi/wayne',
'Pure in browser HTTP requests'
],
].map(([name, url, description = '']) => {
return `* <a href="${url}">${name}</a> — <white>${description}</white>`;
}),
''
].flat(),
skills: [
'',
'<white>languages</white>',
[
'JavaScript',
'TypeScript',
'Python',
'SQL',
'PHP',
'Bash'
].map(lang => `* <yellow>${lang}</yellow>`),
'',
'<white>libraries</white>',
[
'React.js',
'Redux',
'Jest',
].map(lib => `* <green>${lib}</green>`),
'',
'<white>tools</white>',
[
'Docker',
'git',
'GNU/Linux'
].map(lib => `* <blue>${lib}</blue>`),
''
].flat()
};
This is our basic structure. You can edit it and put your information. First, we will add a cd command that changes the directory.
const root = '~';
let cwd = root;

const commands = {
    cd(dir = null) {
        if (dir === null || (dir === '..' && cwd !== root)) {
            cwd = root;
        } else if (dir.startsWith('~/') && dirs.includes(dir.substring(2))) {
            cwd = dir;
        } else if (dirs.includes(dir)) {
            cwd = root + '/' + dir;
        } else {
            this.error('Wrong directory');
        }
    }
};
This will handle all the cases of changing the directory. Next is to add a prompt.
To see what directory we are in, we need to add a custom prompt to do this.
We can create a function:
const user = 'guest';
const server = 'freecodecamp.org';

function prompt() {
    return `<green>${user}@${server}</green>:<blue>${cwd}</blue>$ `;
}
And use it as an option:
const term = $('body').terminal(commands, {
    greetings: false,
    checkArity: false,
    completion: true,
    exit: false,
    prompt
});
The green color don't look very good, we can use color from Ubuntu to make the terminal look more real.
$.terminal.xml_formatter.tags.green = (attrs) => {
    return `[[;#44D544;]`;
};
Next is the ls command.
function print_dirs() {
     term.echo(dirs.map(dir => {
         return `<blue class="directory">${dir}</blue>`;
     }).join('\n'));
}

const commands = {
    ls(dir = null) {
        if (dir) {
            if (dir.startsWith('~/')) {
                const path = dir.substring(2);
                const dirs = path.split('/');
                if (dirs.length > 1) {
                    this.error('Invalid directory');
                } else {
                    const dir = dirs[0];
                    this.echo(directories[dir].join('\n'));
                }
            } else if (cwd === root) {
                if (dir in directories) {
                    this.echo(directories[dir].join('\n'));
                } else {
                    this.error('Invalid directory');
                }
            } else if (dir === '..') {
                print_dirs();
            } else {
                this.error('Invalid directory');
            }
        } else if (cwd === root) {
            print_dirs();
        } else {
            const dir = cwd.substring(2);
            this.echo(directories[dir].join('\n'));
        }
    }
Similar to green, the blue color is not that great, so we can use the color from Ubuntu. To do this, we need to use custom XML tags in XML formatting:
$.terminal.xml_formatter.tags.blue = (attrs) => {
    return `[[;#55F;;${attrs.class}]`;
};
We added the HTML class for a reason. Let's change directory when the user clicks the directory. Just like we did with commands, we can invoke the cd command the same way as the user typing it:
term.on('click', '.directory', function() {
    const dir = $(this).text();
    term.exec(`cd ~/${dir}`);
});
We also need to update our CSS to change the cursor:
.command, .directory {
    cursor: pointer;
}
How to Improve Completion
Our completion is not perfect as it only completes the commands. If you'd like to have completion that also handles directories, you need to use a function:
const term = $('body').terminal(commands, {
    greetings: false,
    checkArity: false,
    completion(string) {
        // in every function we can use `this` to reference term object
        const cmd = this.get_command();
        // we process the command to extract the command name
        // at the rest of the command (the arguments as one string)
        const { name, rest } = $.terminal.parse_command(cmd);
        if (['cd', 'ls'].includes(name)) {
            if (rest.startsWith('~/')) {
                return dirs.map(dir => `~/${dir}`);
            }
            if (cwd === root) {
                return dirs;
            }
        }
        return Object.keys(commands);
    },
    prompt
});
NOTE: The string argument was left as documentation. It can be used if you only want to complete a single word.
Typing Animation Command
Another command that we will add is an animated joke. We will print random jokes using an API that looks like the user typing.
We will use Joke API.
The API returns JSON with two types of responses: twopart and a single`. This is the code that prints the text on the terminal:
// we use programming jokes so it fit better
// developer portfolio
const url = 'https://v2.jokeapi.dev/joke/Programming';
const commands = {
    async joke() {
        const res = await fetch(url);
        const data = await res.json();
        if (data.type == 'twopart') {
            // as said before in every function, passed directly
            // to the terminal, you can use `this` object
            // to reference terminal instance
            this.echo(`Q: ${data.setup}`);
            this.echo(`A: ${data.delivery}`);
        } else if (data.type === 'single') {
            this.echo(data.joke);
        }
    },
}
To add typing animation, you need to add an option to the echo method:
this.echo(data.joke, { delay: 50, typing: true });
There is one caveat: if you have a sequence of typing animations, you need to await for the previous one to finish (the echo will return a promise when animating). You need to wrap the code in an async function and you need to clear the prompt so don't have any flash between animations. By default, prompt is used for the typing effect. So the full code should look like this:
// we use programming jokes so it fit better
// developer portfolio
const url = 'https://v2.jokeapi.dev/joke/Programming';
const commands = {
    async joke() {
        const res = await fetch(url);
        const data = await res.json();
        (async () => {
            if (data.type == 'twopart') {
                // we set clear the prompt to don't have any
                // flashing between animations
                const prompt = this.get_prompt();
                this.set_prompt('');
                // as said before in every function, passed directly
                // to terminal, you can use `this` object
                // to reference terminal instance
                await this.echo(`Q: ${data.setup}`, {
                    delay: 50,
                    typing: true
                });
                await this.echo(`A: ${data.delivery}`, {
                    delay: 50,
                    typing: true
                });
                // we restore the prompt
                this.set_prompt(prompt);
            } else if (data.type === 'single') {
                await this.echo(data.joke, {
                    delay: 50,
                    typing: true
                });
            }
        })();
    },
}
You can read more about typing animation on a wiki article: Typing Animation.
Credits Command
The last command we will add is a credits command where we will list JavaScript libraries used:
const commands = {
    credits() {
        return [
            '',
            '<white>Used libraries:</white>',
            '* <a href="https://terminal.jcubic.pl">jQuery Terminal</a>',
            '* <a href="https://github.com/patorjk/figlet.js/">Figlet.js</a>',
            '* <a href="https://github.com/jcubic/isomorphic-lolcat">Isomorphic Lolcat</a>',
            '* <a href="https://jokeapi.dev/">Joke API</a>',
            ''
        ].join('\n');
    }
};
This is an example of another way to print something on the terminal, if you return something from a function it will be printed. You can also return a Promise, so you can send an AJAX request to the server and print the results.
Prefilled Commands
You can make it easier for users to know what to do with the terminal, especially if they are not that familiar with Unix. By executing example commands:
term.exec(command)You can also use animation with exec:
term.exec(command, { typing: true, delay: 50 });Here is a fully working Demo of our Interactive Terminal Portfolio Website.
What Next?
You can add a lot of commands to this portfolio. The only limitation is your imagination.
You can check these examples for inspiration:
- CodePen Collection with jQuery Terminal Demos.
- Retro (Vintage) Terminal CodePen Demo.
- jQuery Terminal Examples Page.
- Terminal 404 Error Page.
- Fake GNU/Linux Terminal.
If you have some idea that is not listed here you can ask on StackOverflow with jquery-terminal tag. If you have something more time consuming, you can also ask for paid support.
If you like this post, you can check my website, (that has a terminal portfolio similar to this one, and also a chat), and follow me on Twitter/X and LinkedIn.